Google+ code tricks: Upgrading to the new sign-in / upgrading scopes
I have had many folks ask me how they can do the following things:
- Upgrade from the traditional OAuth flows to the new one-time-code flow
- Authorize with just plus.login and then add additional (optional but useful) services to the user’s account
These are great scenarios where developers and site owners can benefit from understanding the user experience and options that are available when moving forward with the new sign-in features of Google+. In this post, I’ll share some of my personal thoughts and experience with adding, changing, and upgrading OAuth v2 scopes with the sign-in button. Note These are preliminary thoughts on how this could be done and are not official guidance – please let me know if you have additional suggestions for ways that this could be done better!
Upgrade from OAuth v2 to sign-in
In this scenario, you have a site that works with the existing OAuth v2 flows, most likely a server-side flow. If you’re looking to upgrade to use the sign-in button flow, your existing users will need to reauthorize your application. This is because the the sign-in button implicitly is requesting the plus.login scope for sign-in. Let’s take a look at the experience for how this scenario would work!
A demo of the upgrade flow
First, look at this page:
Simple Server-side Sign-in Demo
If the page is not loading, you can logout here. After you connect your account, you will reach an authorization page such as the following:
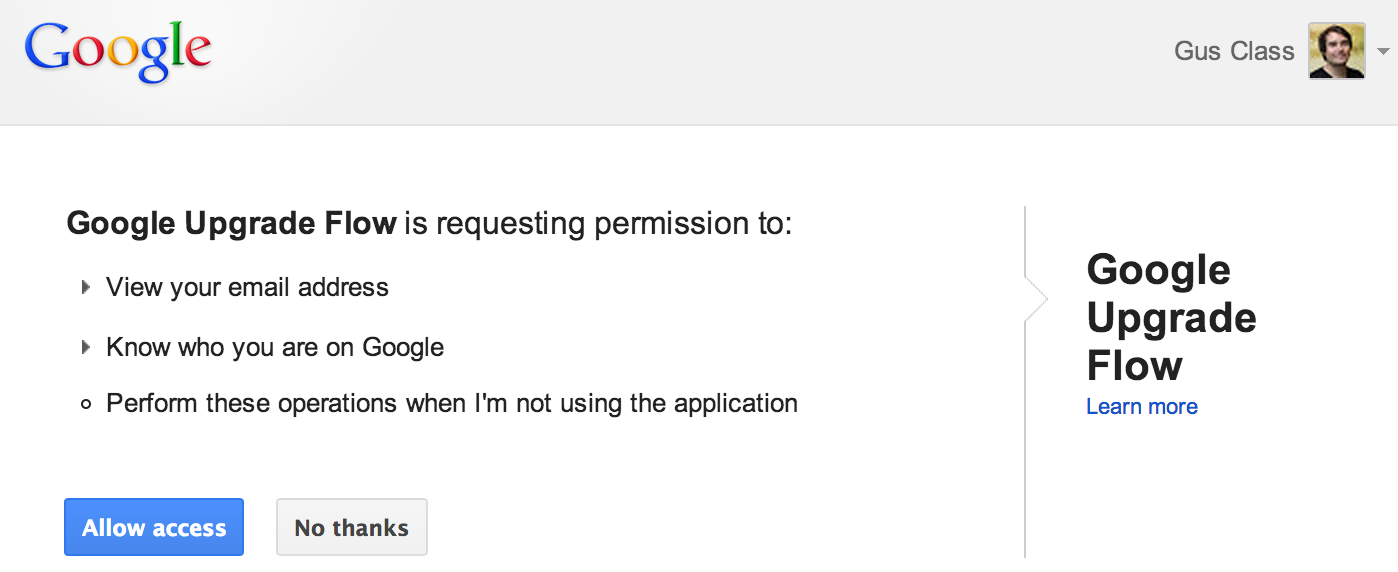
When you reach the site again, signed in to Google, you will be authorized and the page will know your id and can render your profile.
Let’s now assume we want to upgrade the user’s account to use sign-in in order to add users from Google+ to it. In order to do this, the user must login again, this time using the sign-in button as shown in the following demo:
One-time-code Server-side Sign-in Demo
More on why the user must reauthorize later… but the dialog looks as follows
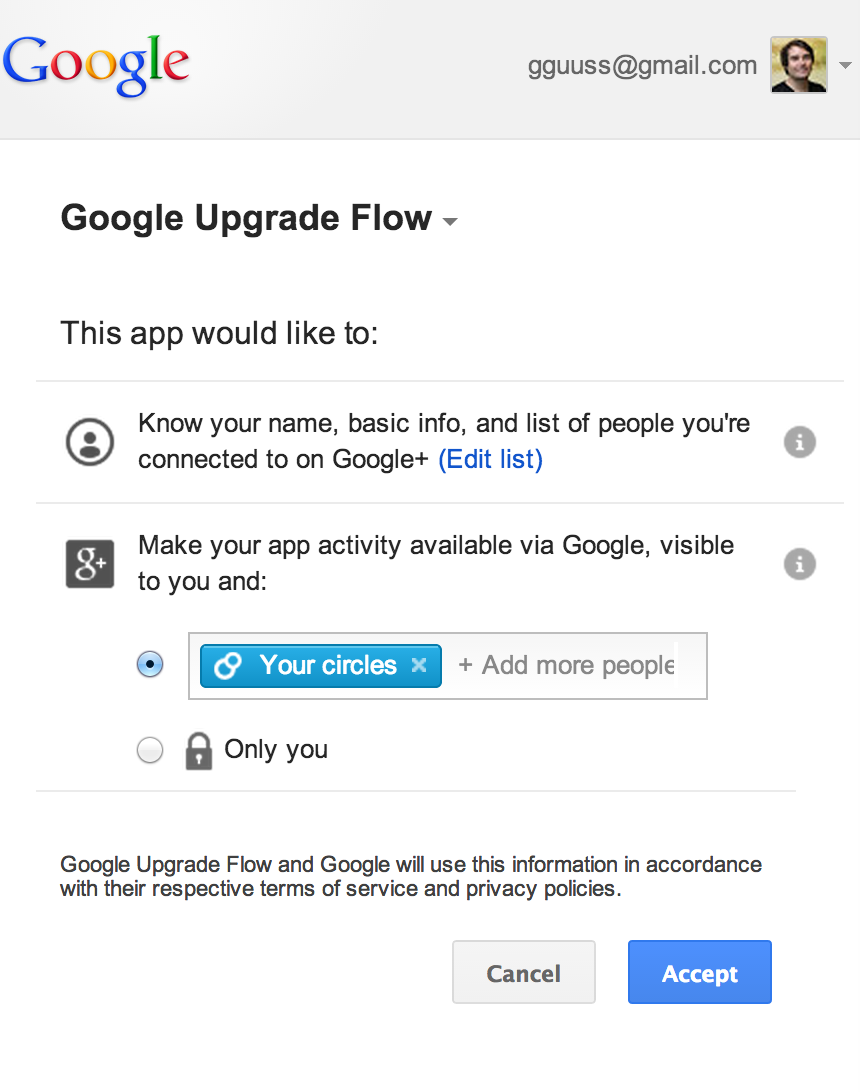
After authorizing again, the user’s account will then be upgraded to take advantage of the new Google+ Sign-in features.
Let’s now take a look at the steps used to upgrade your backend database to reflect the upgrade.
Updating the user information in the site’s data model
First, recall the simple example where the userinfo.email scope was requested and the user was authorized using the conventional server-side flow. At this point, your site could have a model for the user similar to the following:

Let’s assume that the user has created data associated with that flow, so the (…) could represent additional data specific to your site. Their account ID has been set, because it’s returned with the plus.email scope so the user’s account credentials already exist in this database on the site.
Next, after you have updated your site to have the new sign-in button and the user reauthorizes, you can update the existing data on your site for the user and can add the additional information returned from Google+. From a back-end perspective, the model could now look something like this:

The refresh token and access token, highlighted in red, are updated after the code-exchange happens server-side on the one-time-code flow. This is done because the new credentials have access to the additional scopes. The VisibleUser table is also populated with all of the users visible to the site so that the social graph can be taken advantage of.
Next, let’s take a look at the programming steps to upgrade your site.
Steps to upgrade the site
Let’s take a closer look at what was done to accomplish this upgrade path. First, the scopes on the API project must be updated to include the Google+ API. This is done by turning on the Google+ scope from the API console:

Next, the site needs to be updated to include the new sign-in button as described on the Google+ developers documentation page, Google+ sign-in. Summarized briefly, the markup code needs to be added to the site:
    <button
        data-scope="https://www.googleapis.com/auth/plus.login"
        data-requestvisibleactions="http://schemas.google.com/AddActivity"
        data-clientId="YOUR_CLIENT_ID"
        data-accesstype="offline"
        data-callback="onSignInCallback"
        data-theme="dark"
        data-cookiepolicy="single_host_origin">
    </button>
…and a sign-in callback will need to be created that POSTs data to the server-side component:
    /**
     * Hides the sign-in button and connects the server-side app after
     * the user successfully signs in.
     *
     * @param {Object} authResult An Object which contains the access token and
     *   other authentication information.
     */
    onSignInCallback: function(authResult) {
      $('#authResult').html('Auth Result:<br/>');
      for (var field in authResult) {
        $('#authResult').append(' ' + field + ': ' + authResult[field] + '<br/>');
      }
      if (authResult['access_token']) {
        // The user is signed in
        this.authResult = authResult;
        // After we load the Google+ API, render the profile data from Google+.
        gapi.client.load('plus','v1',this.renderProfile);
      } else if (authResult['error']) {
        // There was an error, which means the user is not signed in.
        // As an example, you can troubleshoot by writing to the console:
        console.log('There was an error: ' + authResult['error']);
        $('#authResult').append('Logged out');
        $('#authOps').hide('slow');
        $('#gConnect').show();
      }
      console.log('authResult', authResult);
    }
You can learn more about the one-time-code flow by starting with the Google+ PHP Quickstart, but I’ll go a little further here. In cases where the site already has a user, the account can be looked up by their Google ID, which was most likely an index used previously when getting the user credentials from the userinfo.email scope. By matching the ID to the one returned from the plus.login scope, the account has been determined to have been created before and the credentials can be updated for the authorization credentials to the Google authentication servers. Once you have identified the user to upgrade, the persisted refresh token and access token need to be replaced with the new ones.
What is happening behind the scenes is that the OAuth flow in the original site is requesting only the userinfo.email scope. In the updated site, the sign-in button is implicitly requesting the plus.login scope so the user must be prompted again for permissions. When the user authorizes again on the new site, the identifier for the user’s Google account stay the same, so the account can again easily be matched up to reflect the updated permissions.
Adding additional scopes to a user’s account
Related to the first example is when you want a user to sign up for a service without needing to grant full permissions to your application and then later needing to add additional, optional, scopes to the associated account. For example, let’s say that you have a service that uses Google+ for login and creating an account but then later you want to add access to a user’s Google Calendar and Google Drive. What you can do is create a configuration page that dynamically sets the scopes on the sign-in button and then renders the button to reauthorize the user as shown before.
Warning: This is a hack that works for now but is not necessarily a best practice, use at your own risk!
Scare text aside… let’s look at how this could work.
- The user signs up, you request only the scopes required for signing up / signing in on your site as seen in the original one-time-code sign-in demo.
- Later, you bring the user to a configuration page where they select various scopes and then dynamically add these scopes to an authorization request.
The following demo performs some tricks to programmatically add and change the scopes that are requested and then render the sign-in button programmatically:
Demo: Tricks and hacks for Google+ Sign-in authorization scopes
The (definitely not production, there are global variables!) code for dynamically changing the scopes is as follows:
  var calendarScopeVar = '';
  var driveScopeVar= '';

  function toggleCalendar(){
    if (calendarScopeVar == ''){
      calendarScopeVar = ' https://www.googleapis.com/auth/calendar';
    }else{
      calendarScopeVar = '';
    }
    render();
  }

  function toggleDrive(){
    if (driveScopeVar == ''){
      driveScopeVar = ' https://www.googleapis.com/auth/drive';
    }else{
      driveScopeVar = '';
    }
    render();
  }
  </script>
Checkboxes are added that toggle the scopes:
  <input type="checkbox" onClick="toggleCalendar()"></input>Toggle Calendar<br>
  <input type="checkbox" onClick="toggleDrive()"></input>Toggle Drive<br>
  <div id="outer">
  <div id="gConnect">
    <button id="customBtn"></button>
  </div>
  </div>
Every time that the checkboxes are changed, you re-render the sign-in button as shown in the following code.
  function render() {
    $('#gConnect').empty();
    $('#gConnect').html('<button id="customBtn"></button>');
    var scope = 'https://www.googleapis.com/auth/plus.login';
    scope += ' https://www.googleapis.com/auth/userinfo.email';
    scope += calendarScopeVar;
    scope += driveScopeVar;

    gapi.signin.render('customBtn', {
      'callback': 'onSignInCallback',
      'clientid': '{{ CLIENT_ID }}',
      'cookiepolicy': 'single_host_origin',
      'requestvisibleactions': 'http://schemas.google.com/AddActivity',
      'scope':scope
    });
  }
When the user clicks sign-in, the scopes are requested and the user will be re-authorized. The following image shows the dialog that appears when you select all of the optional scopes.
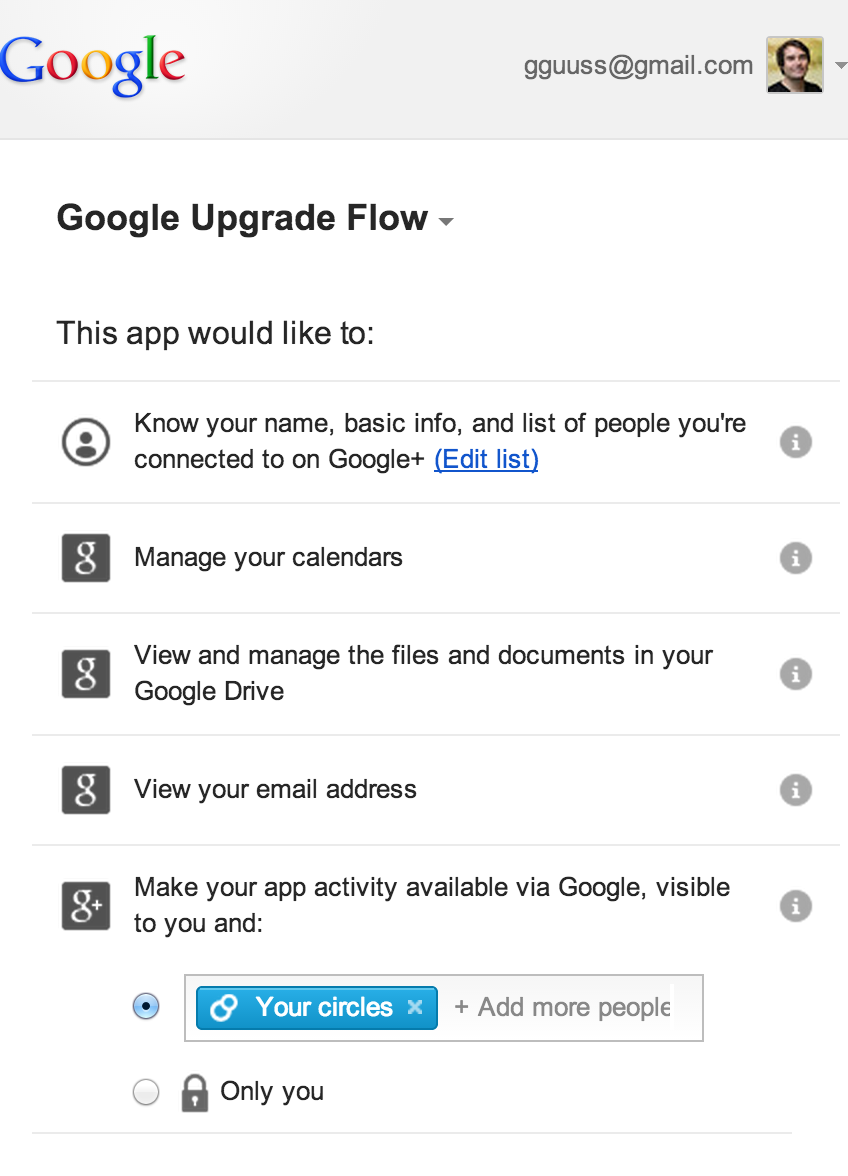
Upon completion of the authorization request, you will again exchange the code server-side to get and update your authorization tokens. After the authorization code is exchanged, the credentials returned will be authorized to have the additional scopes for calendar and/or drive. Upon completion of the authorization flow, you should replace your existing credentials with the updated ones that now have the new authorization parameters set. Note be careful that you don’t remove the scopes that you have already requested and need – plus.login and userinfo.email in this example.
Additional resources
So there you have it, upgrading and replacing scopes using the Google+ sign-in button. This probably has gotten you thinking about how you can do this on your own sites and in your own experiments. The following links should help to get you going and might spark some creativity for you:
Handy thanks Gus. Enjoying your blog..